This article covers the main components of Node.js with practical examples so that people can actually run the snippet and play with it
Overview
This documentation provides a comprehensive guide to setting up a Virtual Private Network (VPN) server using Pritunl, a popular open-source VPN server management platform. By following these steps, users can establish a secure and private network infrastructure suitable for various applications, such as remote access, secure communication, and data privacy.
Prerequisites
- AWS account: Users must have an active AWS (Amazon Web Services) account to create and manage instances on the cloud platform.
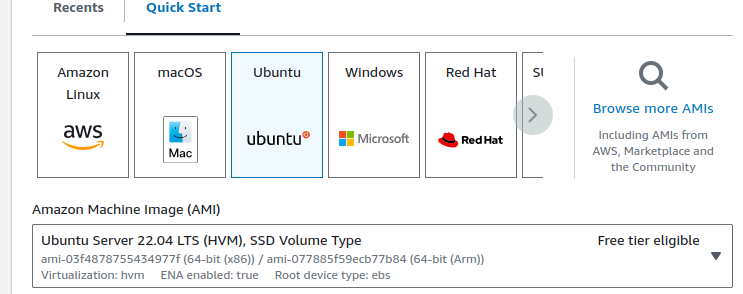
- Instance creation: An EC2 instance needs to be created in the desired region (e.g., Mumbai) using the Ubuntu 22.04 AMI. Users should ensure that ports 80, 443, and 22 are allowed in the security group settings.
- Access to the instance: Users need SSH access to the instance created on AWS. They should possess the private key associated with the EC2 instance to establish a secure connection.
- Web browser: A web browser, preferably Google Chrome, is required to access the Pritunl dashboard and configure the VPN server settings.
- Pritunl client: To connect to the VPN server from client machines, users must install the Pritunl client application. The client can be installed on various operating systems, including Windows, macOS, and Linux distributions.
- Network configuration: Users should ensure proper network configuration, including DNS settings, virtual network details, and firewall rules, to establish seamless communication between the VPN server and client machines.
Setting up a VPN Server
Step 1: Setup Instance
- Launch an instance in the Mumbai region using the Ubuntu 22.04 AMI.
- Ensure ports 80, 443, and 22 are allowed in the security group.
Steps for Launching Instance
- Select the Mumbai region.
- Launch an instance, providing a name.
- Choose the specified AMI.
- Select t2.micro instance type
- Choose or create a key pair
- Select the default VPC and adjust network settings if necessary
- Allow SSH, HTTP, and HTTPS ports in the security group
- Launch the instance
-
Step 2: Access the Instance and Setup VPN
- SSH into the instance: ssh ubuntu@yourip -i “key”
- Switch to root: sudo -i
- Execute the following commands
sudo tee /etc/apt/sources.list.d/pritunl.list << EOF

deb http://repo.pritunl.com/stable/apt jammy main

EOF


# Import signing key from keyserver

sudo apt-key adv --keyserver hkp://keyserver.ubuntu.com --recv 7568D9BB55FF9E5287D586017AE645C0CF8E292A

# Alternative import from download if keyserver offline

curl https://raw.githubusercontent.com/pritunl/pgp/master/pritunl_repo_pub.asc | sudo apt-key add -


sudo tee /etc/apt/sources.list.d/mongodb-org-6.0.list << EOF

deb https://repo.mongodb.org/apt/ubuntu jammy/mongodb-org/6.0 multiverse

EOF


wget -qO - https://www.mongodb.org/static/pgp/server-6.0.asc | sudo apt-key add -


sudo apt update

sudo apt --assume-yes upgrade


# WireGuard server support

sudo apt -y install wireguard wireguard-tools


sudo ufw disable


sudo apt -y install pritunl mongodb-org

sudo systemctl enable mongod pritunl

sudo systemctl start mongod pritunl
- Respond with Enter twice when prompted during the process
- Now, Execute the following commands:
sudo sh -c 'echo "* hard nofile 64000" >> /etc/security/limits.conf'

sudo sh -c 'echo "* soft nofile 64000" >> /etc/security/limits.conf'

sudo sh -c 'echo "root hard nofile 64000" >> /etc/security/limits.conf'

sudo sh -c 'echo "root soft nofile 64000" >> /etc/security/limits.conf'
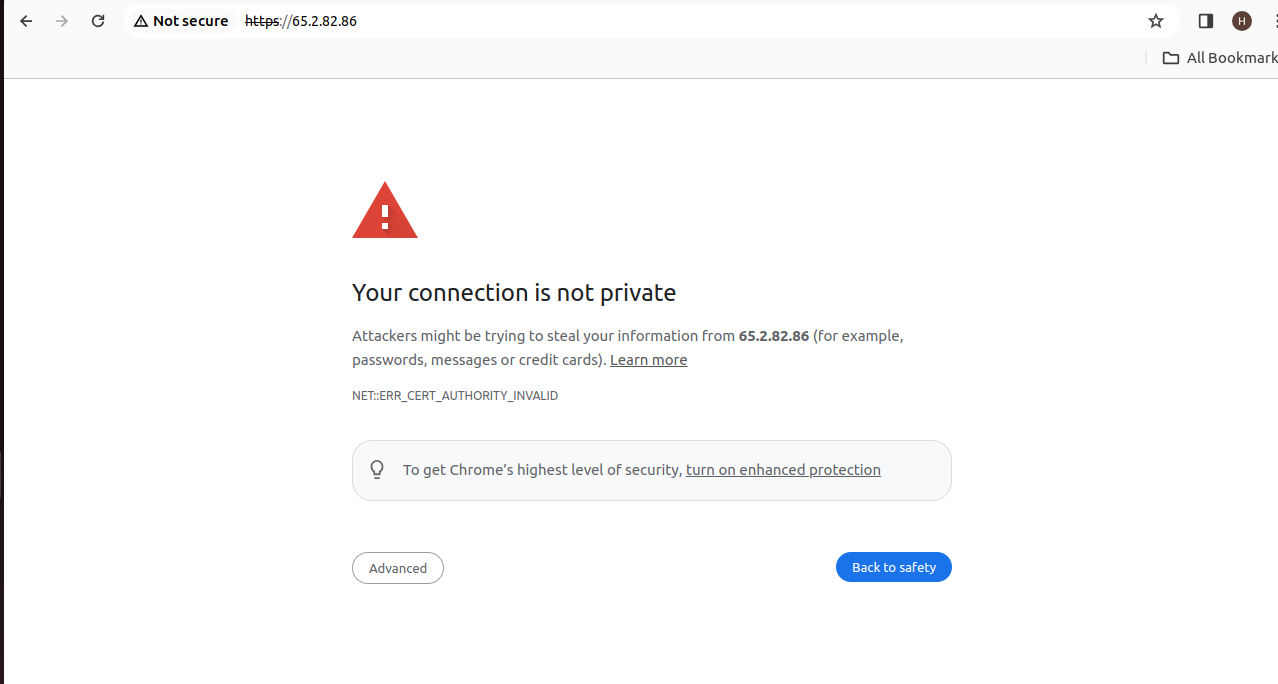
Step 3: Access the App via Chrome Browser From Your System
- Go to the Chrome dashboard and enter the URL as follows
- Proceed to t
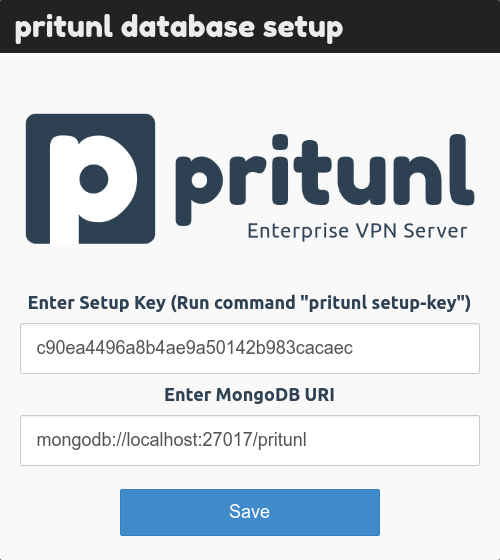
Step 4: Generate Setup Key
- Run the command:
pritunl setup-key

- Get the setup key from the command output.
Step 5: Setup VPN
- Enter the setup key in the dashboard and save.
- Ensure port 27017 is allowed in the security group.
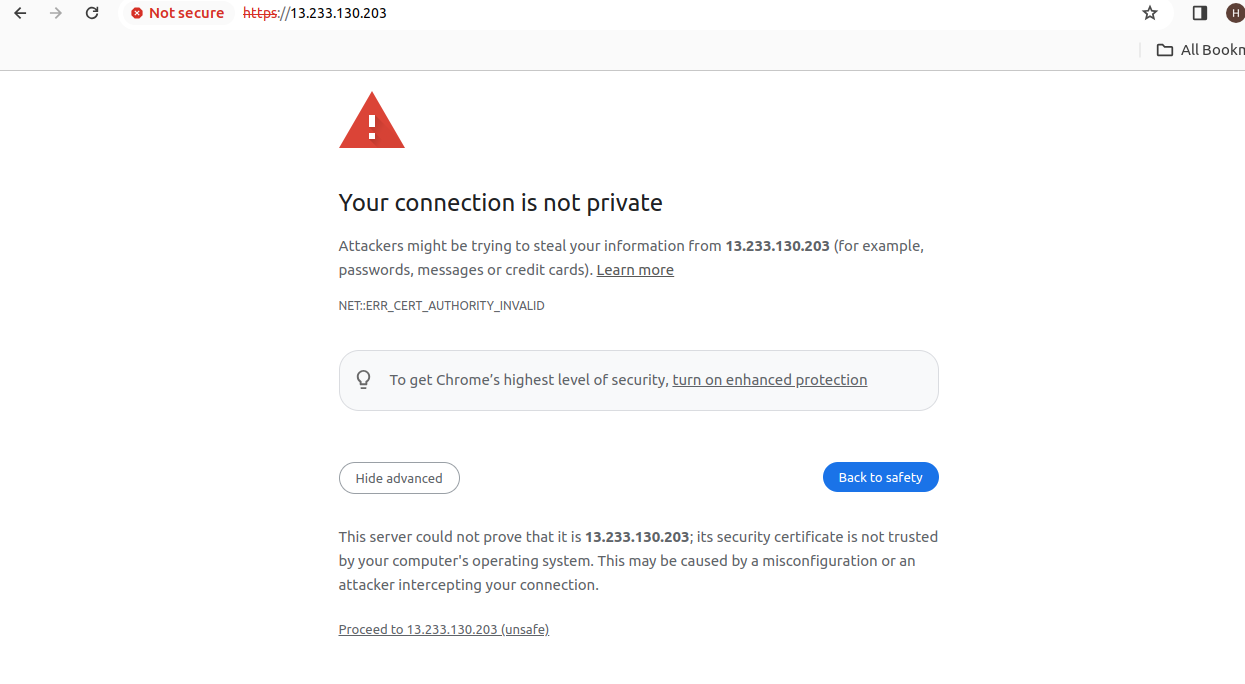
Then again, this page will show.
Proceed with the connection again
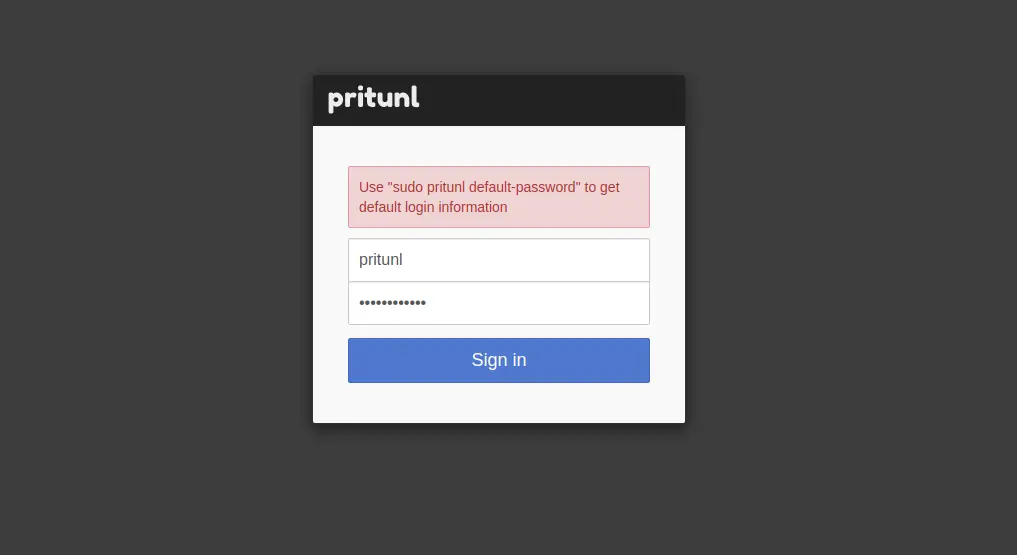
Step 6: View Default Password
- To view the username and password, execute the comm
pritunl default-password

- Copy the credentials from the output and sign in to the online interface.
After that, you’ll be sent to the setup screen.
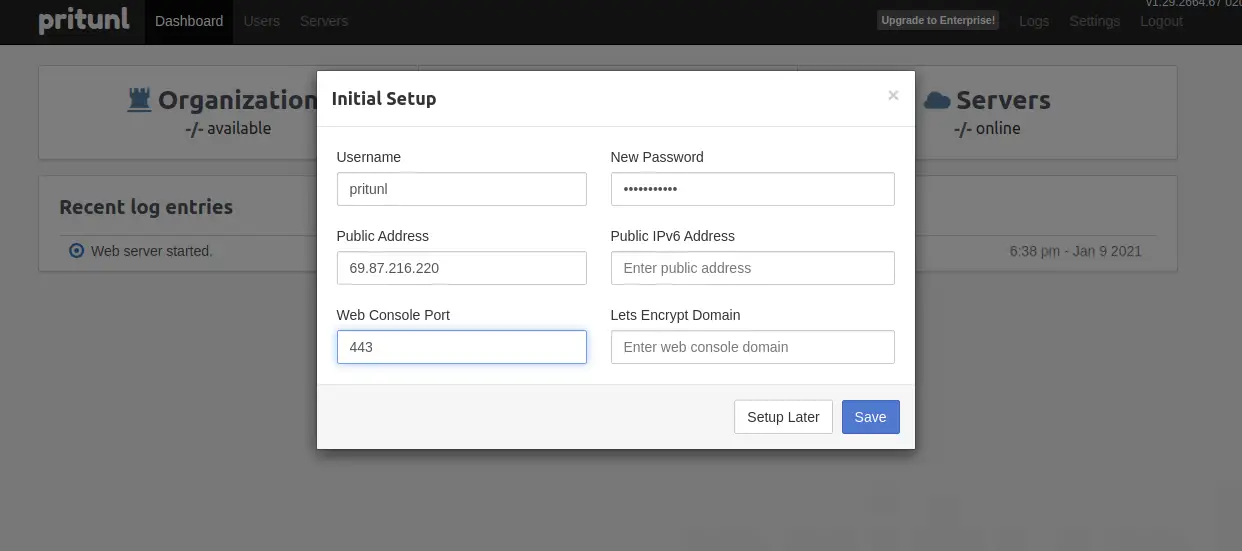
Click the Save button after making any necessary changes to your username or password. This is the page that you should view.
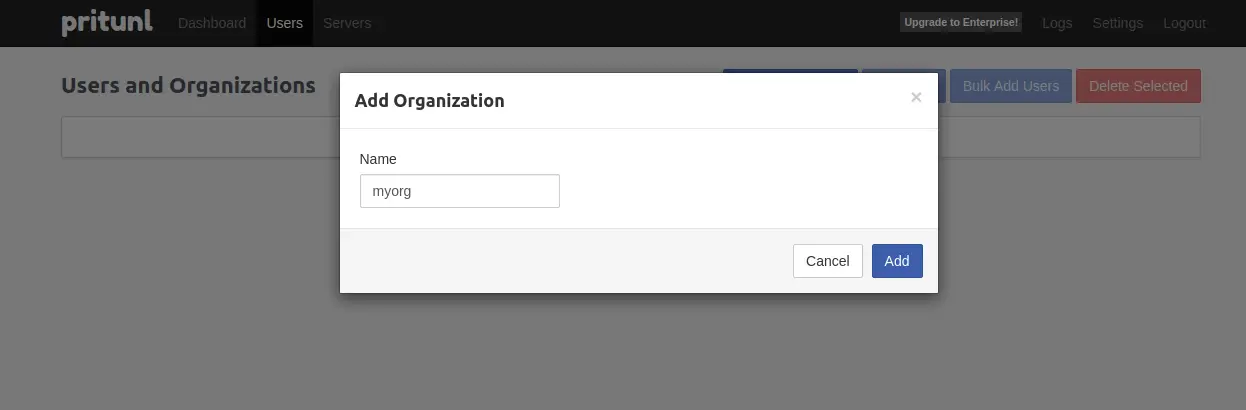
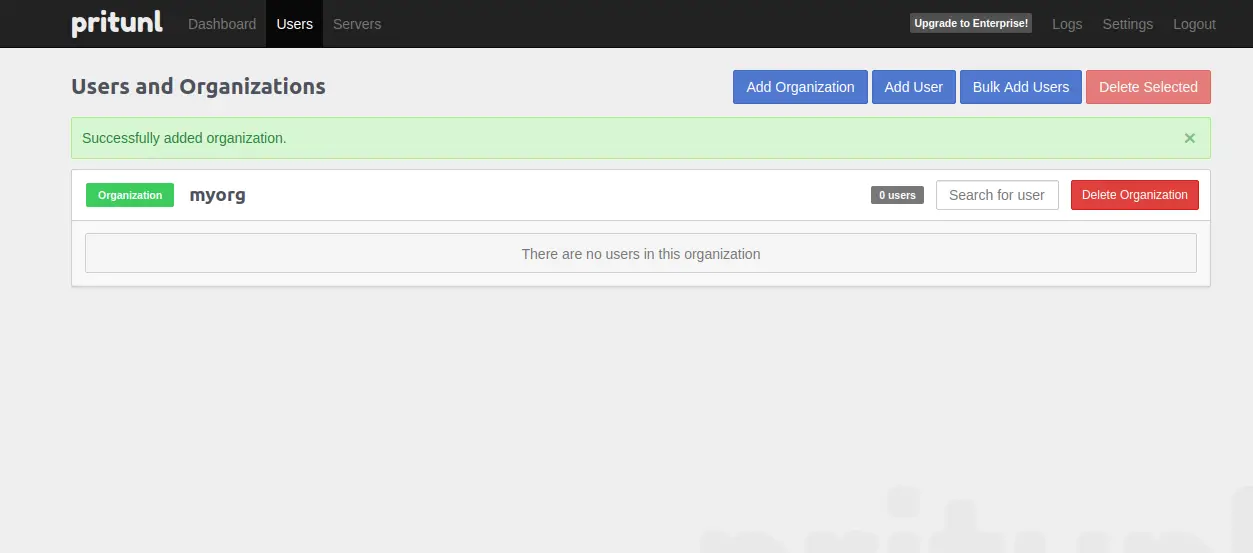
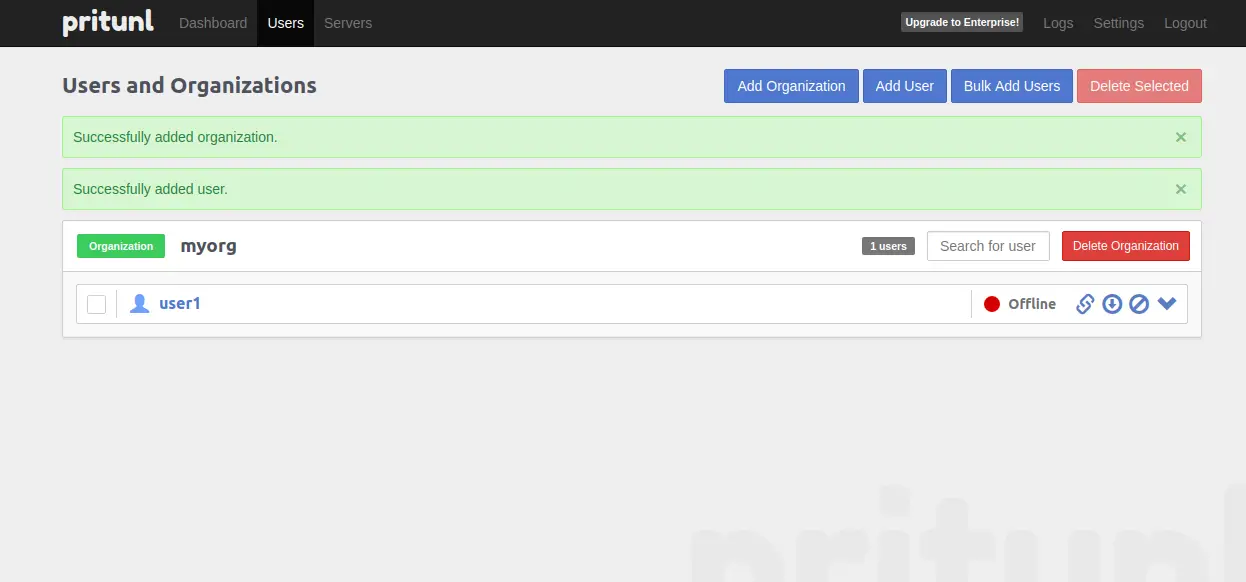
Step 7: Add Organization
- Click on the “Add Organization” button in the user section.
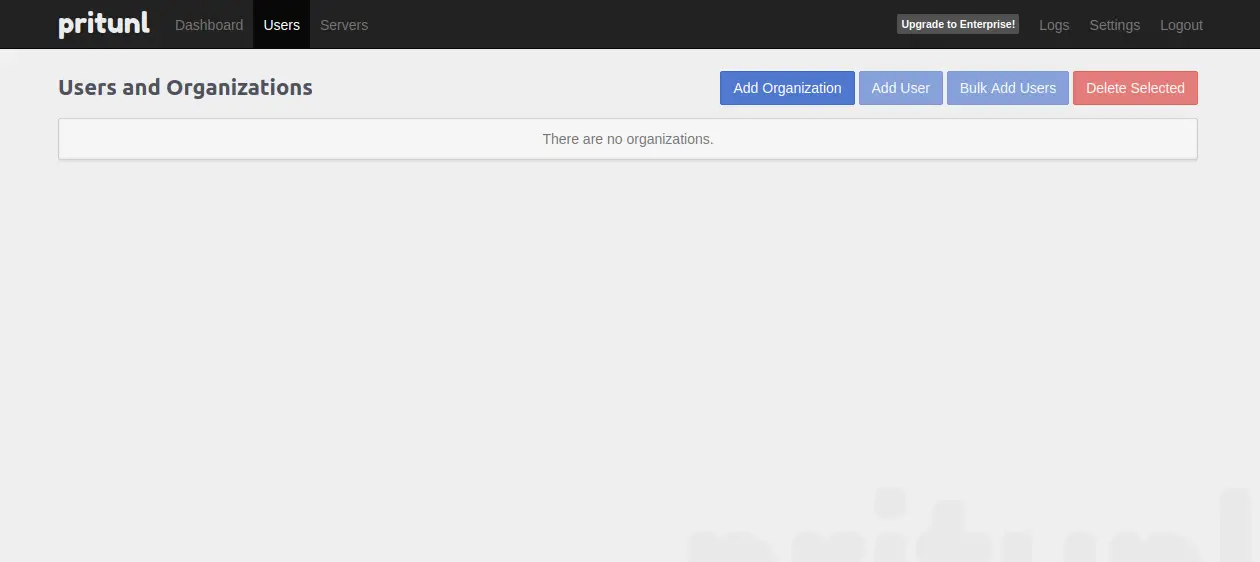
- Enter the organization name and press Add.
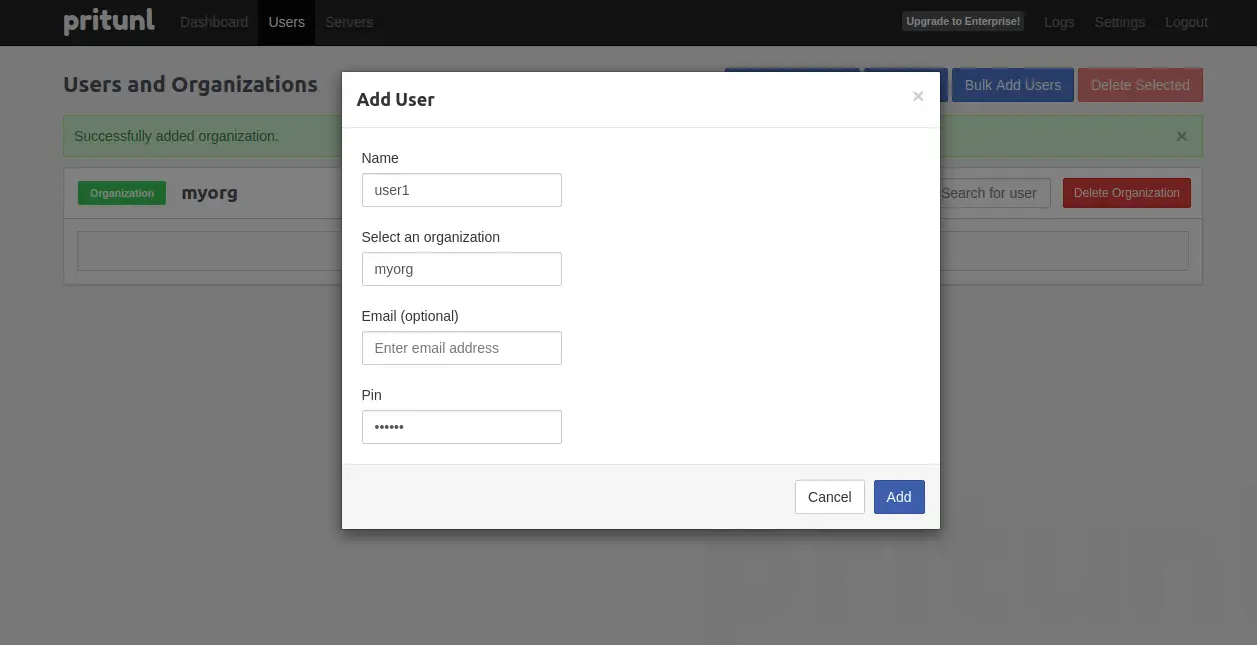
Step 8: Add User
-
Select the “Add User” option.
-
Enter username, select PIN, and press Add.
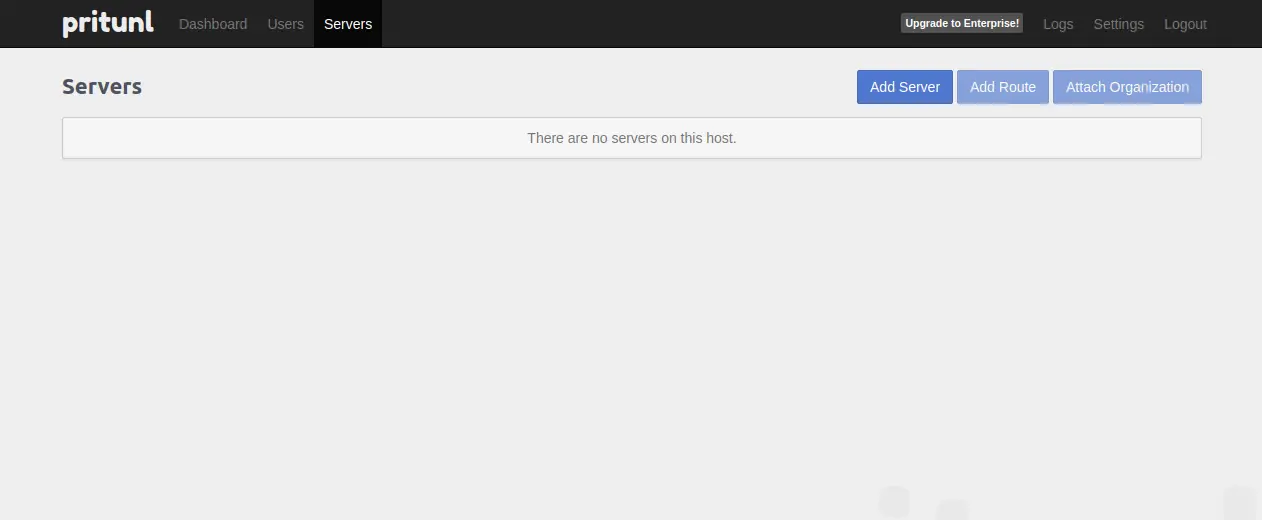
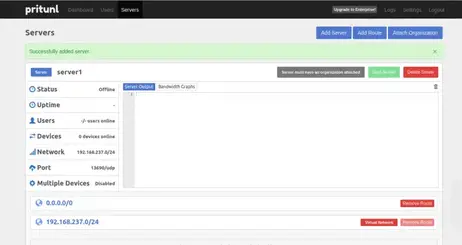
Step 9: Setup Server
- Select the Servers tab.
The page you should view is this one:
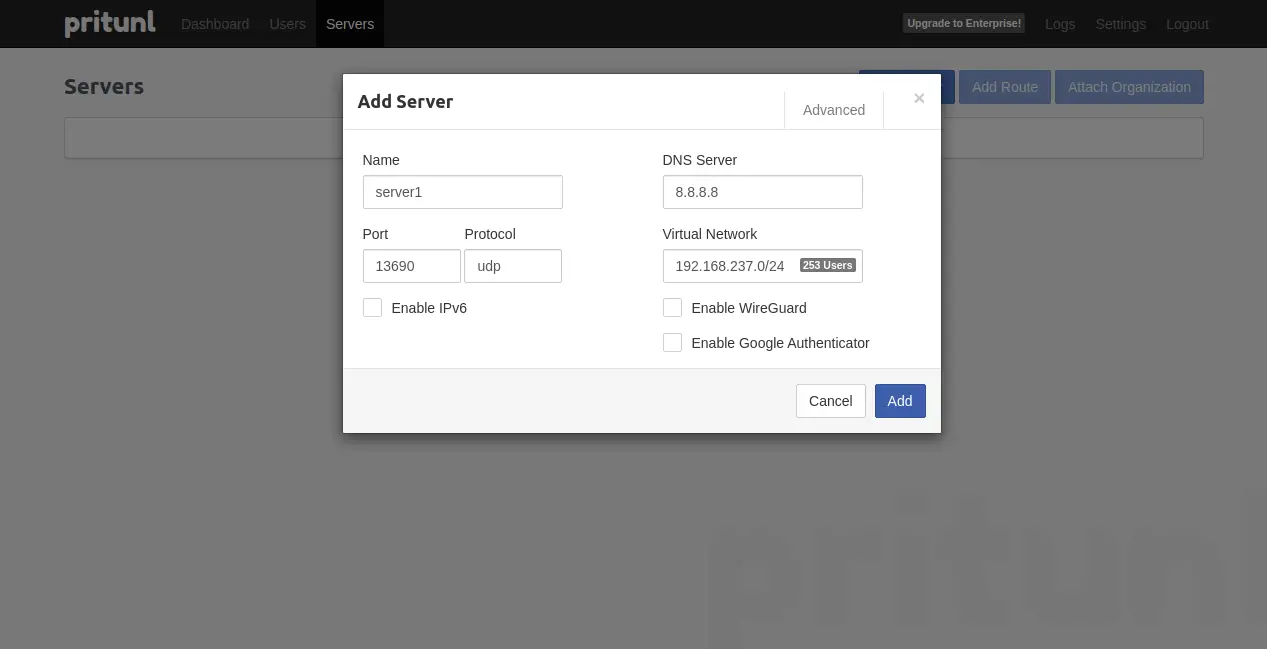
- Click on “Add Server” option.
The page you should view is this one:
- Enter DNS IP, virtual network, port, and server name. Click Add.
- Ensure the specified port is allowed in the security group.
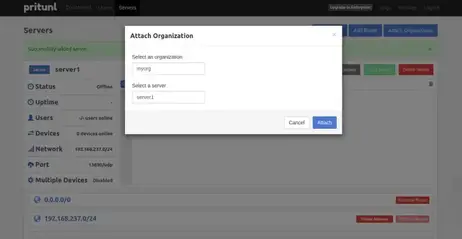
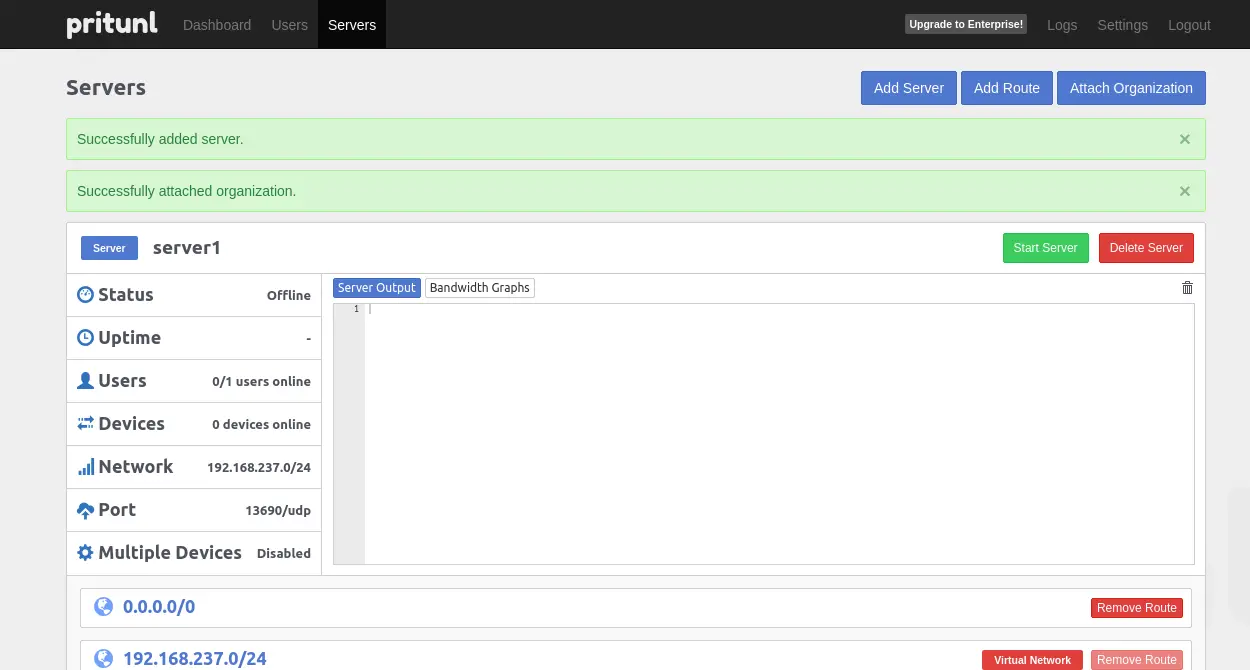
Step 10: For Attach Organisation
The page you should view is this one:
- Click on the “Attach Organization” option to connect the organization to the server.
 This is the page that you ought to view:
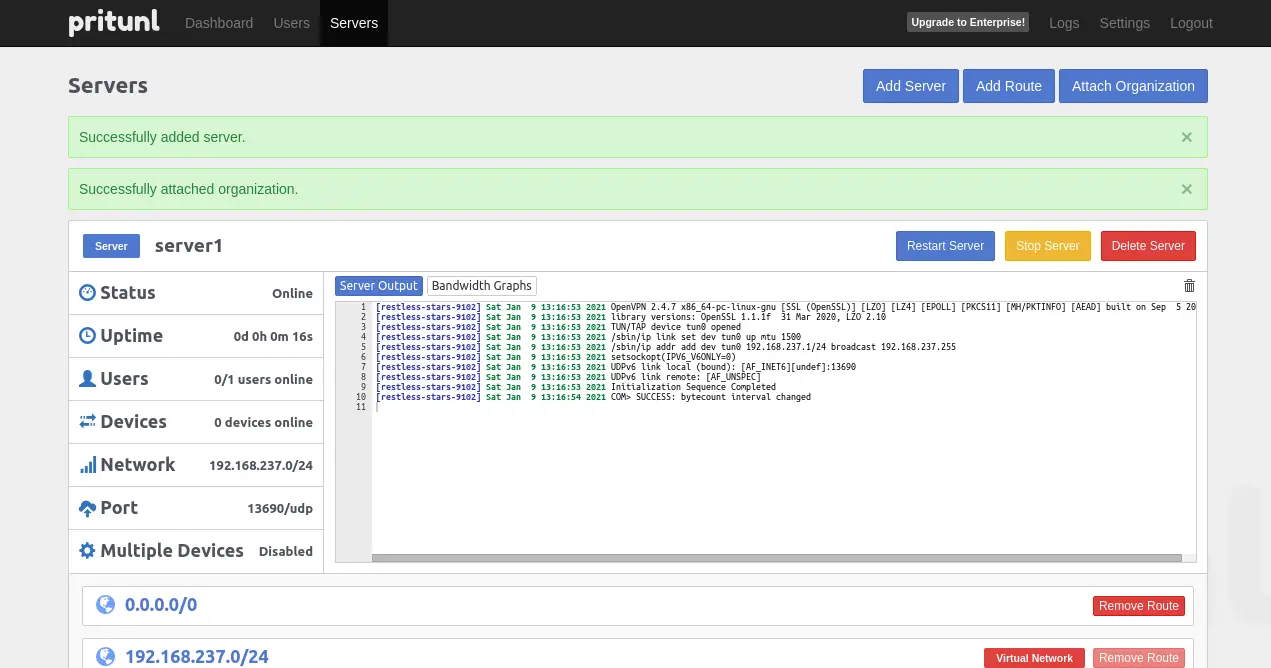
Step 11: Start Server
The page you should view is this one:
- Click on the “Start Server” button to launch the VPN server.
The page you should view is this one:
Setting up Client Machine
Step 12: Setup Client Machine
- Install the Pritunl client or launch a new instance.
- During installation, type ‘y’ when prompted.
sudo tee /etc/apt/sources.list.d/pritunl.list << EOF

deb https://repo.pritunl.com/stable/apt jammy main

EOF


sudo apt --assume-yes install gnupg

gpg --keyserver hkp://keyserver.ubuntu.com --recv-keys 7568D9BB55FF9E5287D586017AE645C0CF8E292A

gpg --armor --export 7568D9BB55FF9E5287D586017AE645C0CF8E292A | sudo tee /etc/apt/trusted.gpg.d/pritunl.asc

sudo apt update

sudo apt install pritunl-client-electron
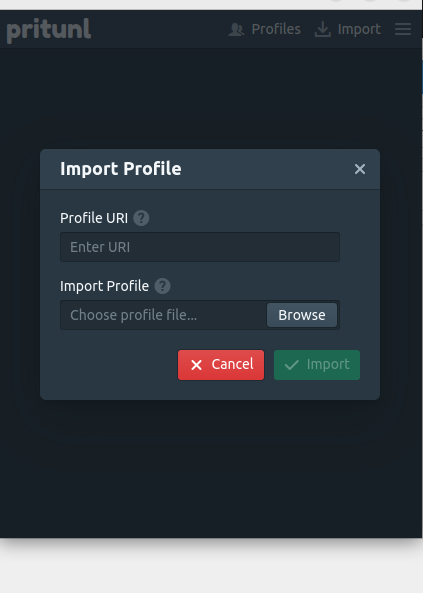
Step 13: Download User Profile
- Download the user profile.

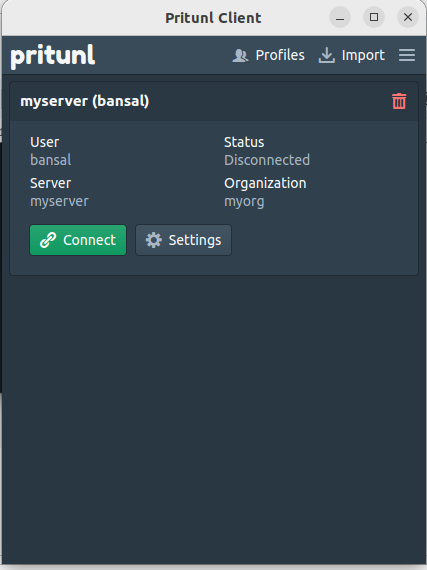
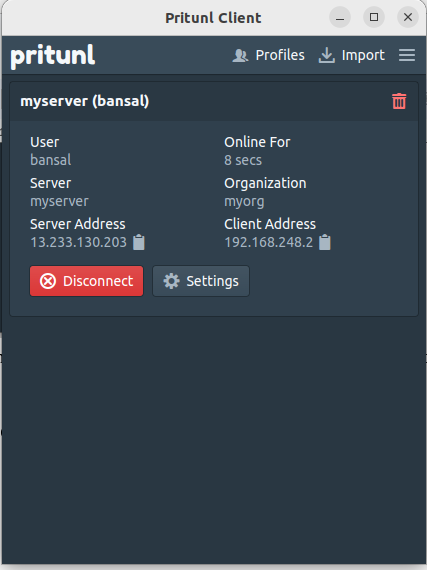
Step 14: Access Pritunl Client
- Access the Pritunl client application from the Application menu.
- Browse and attach the user profile.
- Connect and provide the PIN created in Step 8.
- Ensure proper connection establishment.